You try to upload a file to a portal and get "maximum size 2 MB", or your email bounces an attachment, and you have a few minutes to fix it. This guide is entirely practical: how to compress a PDF with the Compress PDF tool step by step, which option to pick for your kind of file, what to do when the file won't shrink, and how to check that the result is fit to send.
If you want to understand first why PDFs get big and what lossless and lossy compression actually mean, read What Is PDF Compression?. If you are weighing different compression methods, including ones that need other software, the right article is The Best PDF Compression Methods. Here we focus on doing it.
Quick answer
Open Compress PDF and choose your file. If it is a text PDF (exported from Word or similar), keep "Lossless — keeps text selectable". If it is a scan or made from phone photos, pick "Strong" and leave the quality at 60%. Click "Process Now", read the before → after size message, then "Preview Result" and "Download Result". Always keep the original.
Before you start: identify your file in ten seconds
The right option in the tool depends on one question: does your file contain real text, or is every page a picture? The test is simple. Open the file in any PDF reader and try to select a single word with the mouse, or with a long press on a phone.
- If the text selects word by word: it is a text PDF, usually exported from office software. These files tend to be small; whatever weight they have comes from embedded fonts and any images inside.
- If the whole page selects as one block, or nothing selects at all: the file is a scan or built from images. This is where large sizes come from, and where compression genuinely helps.
- A mixed file: a report with text plus many photos, or a catalog. Here it is worth trying both options and comparing.
The steps in detail
- Open the tool: go to Compress PDF in any modern browser on a computer or phone. No account and nothing to install.
- Choose the file: click the "Select files" box or drag the file onto it. The tool handles one file at a time and shows small thumbnails of its pages once it is loaded.
- Choose the compression type: the "Compression type" menu has exactly two options:
- "Lossless — keeps text selectable" (the default).
- "Strong — for scans and image-heavy files (pages become images)".
- Set the quality if you chose Strong: the "Image quality for strong compression" slider runs from 10% to 90% and starts at 60%. It has no effect at all on Lossless, so there is no point moving it in that case.
- Run it: click "Process Now" and watch the progress bar. In Strong mode pages are drawn one after another, so a long file takes longer.
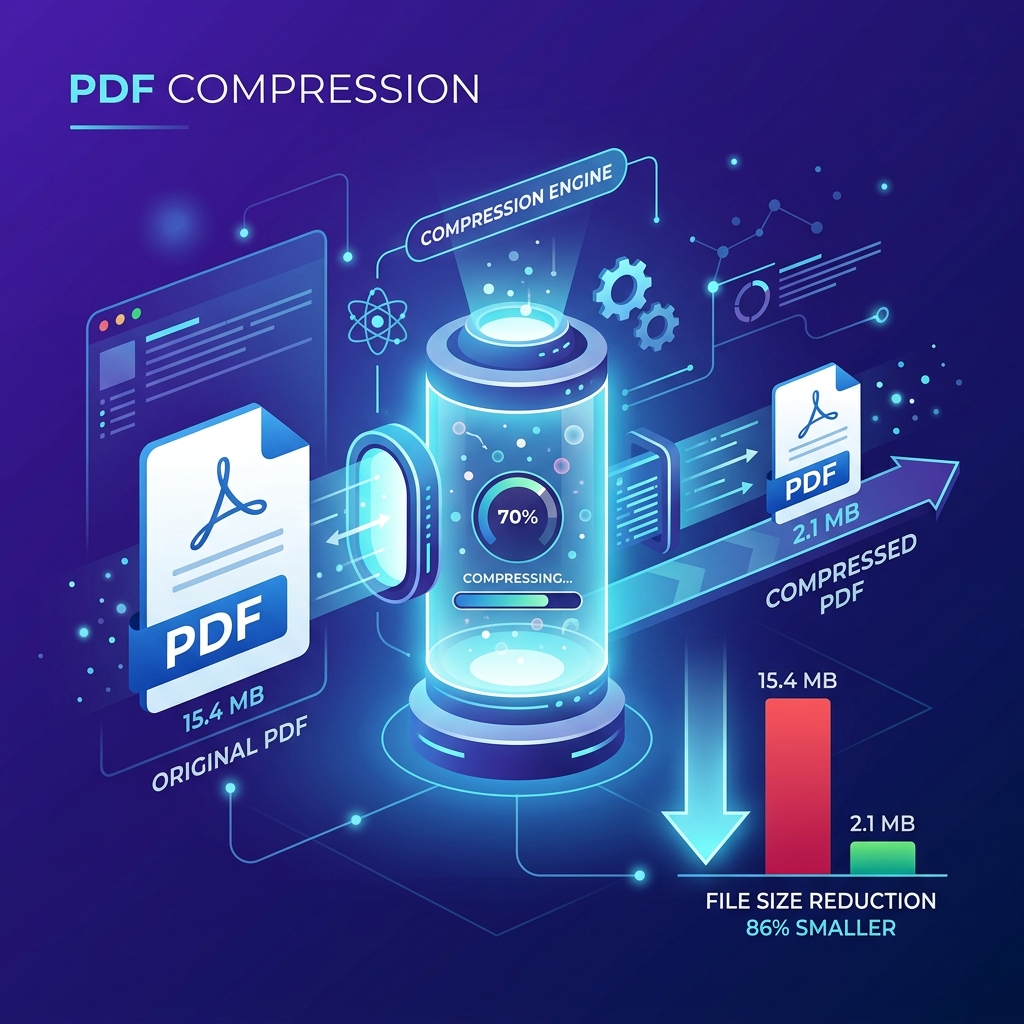
- Read the result message: on success you will see something like "Done successfully! — 7.33 MB → 798 KB (−89%)": original size, new size, percentage saved. If the pages were turned into images, the message adds "pages converted to images".
- Preview, then download: click "Preview Result" to page through the output, then "Download Result". The file is saved as
compressed.pdf, so rename it to something meaningful before you send it.
Which option for which file?
Lossless: for text PDFs
This option saves the file again with a more compact internal structure and leaves text, images and fonts untouched. Text stays selectable, searchable and copyable, and links and form fields stay as they were. That makes it the safe choice for a contract, a CV, or a thesis someone will quote from.
Keep your expectations realistic, though: the gain is usually small, and sometimes there is none. A text file of a few pages is small to begin with, and a scanned file barely changes because its weight sits in images this option does not touch.
Strong: for scans and phone photos
Here the tool redraws every page as a JPEG image at the quality you chose, then builds a new PDF from those images at the same page sizes. This is the option that visibly shrinks scanned files. The price is that the text becomes part of the picture: you can no longer select or search it, and links, form fields and bookmarks do not carry over to the new file.
So don't use it on a text PDF unless you are fine with losing selectable text. And if the redrawn version happens to come out larger than the lossless one (this can happen with lean text files), the tool automatically keeps the smaller result.
How to pick the quality number
- 60% (the default): a good starting point for most scanned documents. Normal-sized text stays clearly readable.
- 40% or lower: when a strict portal limit forces a smaller file. Watch small numbers and stamps; they suffer first.
- 70% or higher: for very small print, technical drawings or dense tables. From 70% up the tool also draws the page at a higher resolution, so the file grows noticeably.
What the tool gave us in a real test
Instead of estimates, we ran our Compress PDF tool on three test files on October 8, 2026. These are the numbers the tool reported:
- A 6-page text PDF exported from software (no images).
- The same pages scanned as JPEG at 200 dpi, as most phone scanning apps do.
- The same pages scanned as lossless PNG, as some office scanners do.
| File | Original size | Lossless | Strong 70% | Strong 60% | Strong 40% |
|---|---|---|---|---|---|
| Text, 6 pages | 5 KB | 4 KB | 4 KB | 4 KB | 4 KB |
| JPEG scan, 6 pages | 7.33 MB | No change | 1.42 MB (−81%) | 798 KB (−89%) | 628 KB (−92%) |
| PNG scan, 6 pages | 57.45 MB | No change | 1.40 MB (−98%) | 798 KB (−99%) | 627 KB (−99%) |
What this shows: lossless compression barely changes scanned files, and a text PDF is already small, so it gains little. The real difference comes from strong compression on scans, and 60% quality kept the text clearly readable in our test. Notice also that the two scanned files ended up at almost the same size despite starting very far apart: Strong mode redraws the pages from scratch, so how they were stored before matters little. Your results will vary with scan resolution, color and page count, so always preview the output before sending it.
When the tool says the file is already compact
If the tool can't make the file meaningfully smaller, it will not hand you a copy that is the same size or bigger. Instead it gives you back the original unchanged and shows a message like: "This file is already compact (… KB) and could not be reduced further." If you were on Lossless, it also suggests you try "Strong compression".
What to do next depends on the file:
- A scan, and the message appeared on Lossless: that is expected. Switch to "Strong" at 60%.
- A small text file: often there is no real problem. A file of a few hundred kilobytes fits most portals and email services. Check the actual limit before chasing a reduction you don't need.
- The message appeared even on Strong: the file may already be heavily compressed, or its pages may be very simple. The fix here isn't more compression but less content: remove pages you don't need, or split the file.
Avoid running the same file through Strong again and again. Each pass redraws an image that was already compressed, so artifacts build up around the letters with little real size gain. If you need a smaller file, go back to the original and choose a lower quality.
Getting under a portal size limit
Government, university and job-application portals often cap each file somewhere between 200 KB and 5 MB. The short rule: first remove pages that weren't asked for with Remove Pages, then compress the original with Strong compression, and if it is still over the limit, go down one step and compress the original again. It is faster, though, to work out the quality in advance from the number of pages. We explain how, with a table of measurements for every quality step, in our guide to compressing a PDF to under 1 MB.
How to check the result before sending it
"Done successfully" means the file got smaller, not that it is fit for your purpose. Spend a minute checking:
- Zoom in: open the downloaded file and zoom to 150% or 200%. Look at the smallest thing on the page: an ID number, dates, figures in a table, a stamp or a drawn signature. If those are readable, the file is fine.
- Try selecting text: after Lossless, text should still select. After Strong it won't, and that is normal. If the recipient needs searchable text, send the text version instead.
- Fillable forms: Strong turns form fields into a flat picture, so they can't be filled in afterwards. Fill the form first, or use Lossless.
- Digital signatures: a certificate-based digital signature is tied to the file exactly as it was signed, and any re-save can break its validation, even a lossless one. If your file is digitally signed, don't compress it; ask the signer for a lighter copy instead. A signature drawn as an image simply stays visible.
- Page count and order: quickly confirm that every page is there, in the right order.
On a phone, and the question of privacy
The tool works in a phone browser (Chrome or Safari) with the same steps. On a phone, "Select files" opens your files or apps list; pick the PDF from Downloads or the Files app. After "Download Result" the file usually lands in your Downloads folder. Strong mode needs memory to draw the pages, so very long files can be slow on an older phone, and a computer will be faster in that case. If your document is still a set of photos rather than a PDF, the guide to turning phone photos into a PDF covers photographing, converting and compressing together.
On privacy: all processing happens inside your browser using the pdf-lib and PDF.js libraries, and the file is not sent to SmokePDF's servers. That matters with documents such as ID cards or bank statements.
A note on password-protected files: they may not compress correctly. If you know the password, remove the protection first with Unlock PDF, compress, then protect it again if needed with Protect PDF.
Frequently asked questions
Does compression change the page size or the number of pages?
No. In both modes the pages keep their original count and dimensions, so an A4 page stays A4. What changes in Strong mode is how the page content is stored: it becomes one image instead of separate text and pictures.
Will official portals accept a file compressed with Strong?
The output is an ordinary PDF, so portals accept it as a format. What matters is that it is readable, with numbers and stamps clear when zoomed. If the institution requires searchable text, Strong is not the right choice for it.
Can I get selectable text back after using Strong?
Not from the compressed file itself, because the pages are now images, which is why you should always keep the original. Recovering text from an image requires optical character recognition, which SmokePDF does not offer; you would need other software that supports it.
Can I compress several files at once?
The tool processes one file at a time. If you need a single file, compress each document and then merge them; if you need separate files, repeat the steps for each one.
Is a compressed file still good for printing?
Lossless changes nothing about print quality. Strong draws pages at a resolution that is fine for on-screen reading and ordinary office printing, but not for professional print work; print from the original in that case.
The bottom line
First find out whether your file is text or a scan. For text, use "Lossless" and accept that the gain is small; for scans, use "Strong" at 60% and adjust from there. Read the size message, zoom in before sending, and remove extra pages or split the file rather than lowering quality until legibility suffers. And keep the original: it is what you go back to when you need a different version.