You open an application portal for a job, a scholarship or a government form, and under the upload box there is one short line: "Maximum size 1 MB". Sometimes it says 500 KB, or even 200 KB. Your scanned file is 7 MB. Most people compress again and again until the site accepts the file, then find out the stamp is no longer readable. This article offers a calculated method instead of guesswork: work out each page's share of the limit, then pick the quality from a table of measurements we took on real files, so you reach the limit on the first or second try.
Quick answer
Divide the size limit by the number of pages to get each page's budget, and keep about 5% in reserve. In our measurements, a scanned or phone-photographed page takes about 125 KB with strong compression at 60% quality, and about 55 KB at 30%. So a 6-page file usually fits under 1 MB at 60%, and under 500 KB at 30%. If you would need less than 30%, remove pages or split the file rather than giving up legibility.
Start with a page budget, not the quality slider
A scanned PDF weighs roughly the sum of its pages, because each page is a separate image. So the useful question is not "how much should I compress the file?" but "how much is each page allowed?". Divide the limit by the number of pages and subtract 5% as a safety margin:
| Portal limit | 1 page | 2 pages | 4 pages | 6 pages |
|---|---|---|---|---|
| 2 MB | about 1,900 KB | about 950 KB | about 475 KB | about 315 KB |
| 1 MB | about 950 KB | about 475 KB | about 235 KB | about 155 KB |
| 500 KB | about 475 KB | about 235 KB | about 120 KB | about 80 KB |
| 200 KB | about 190 KB | about 95 KB | about 45 KB | about 30 KB |
This table tells you a lot before you open any tool. Six pages under 200 KB means about 30 KB per page, which is close to the lowest quality possible, and small print becomes hard to read. In that case, start by reducing the number of pages, not by compressing. A single page under 1 MB, on the other hand, is easy and may not need much quality reduction at all.
Careful: the portal's megabyte may not be your computer's
There are two common ways to count a megabyte. Some systems treat it as 1,000,000 bytes; others, including Windows File Explorer, as 1,048,576 bytes. The difference is about 5%. So if your computer shows a file as "0.98 MB", its real size is about 1,027,000 bytes, and a portal that counts a megabyte as a million bytes may reject it.
SmokePDF's Compress PDF tool also counts a megabyte as 1,048,576 bytes. So don't rely on a number that touches the limit. Aim at least 5% below it; that is the margin built into the table above. For the exact size in bytes, right-click the file and choose "Properties" on Windows or "Get Info" on a Mac, or open it in PDF Info.
Our measurements: how much a page takes at each quality
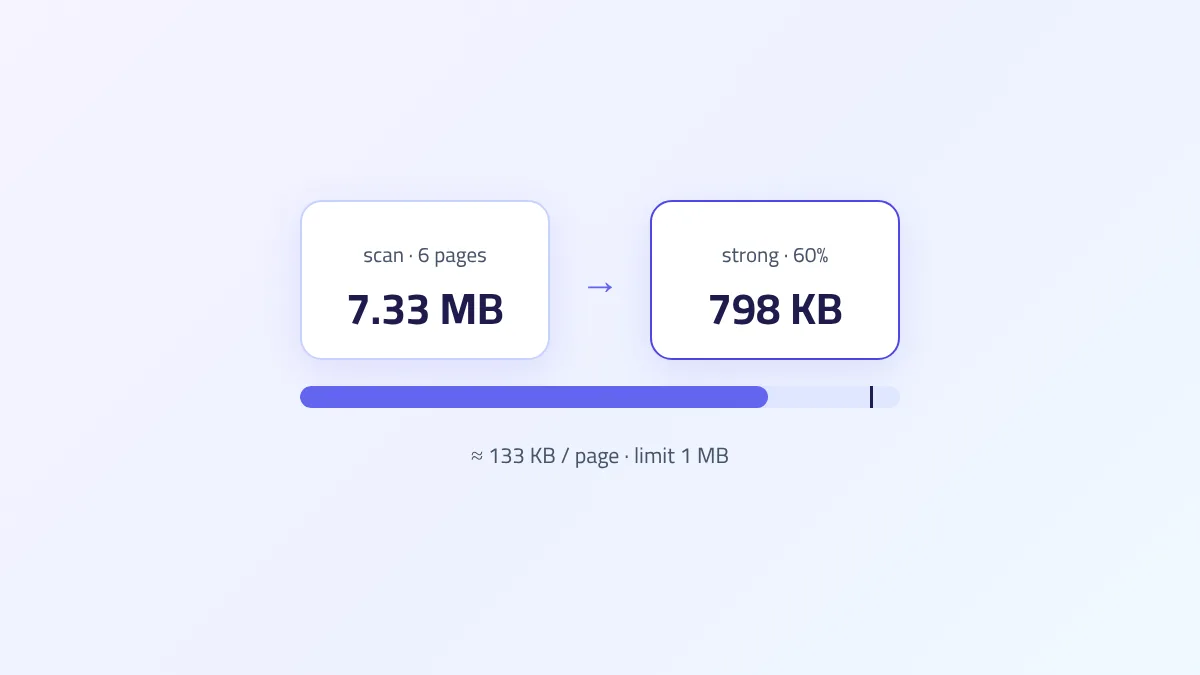
To base the choice of quality on numbers, we ran two files through SmokePDF's strong compression at every quality step and recorded the output size. The first is a single A4 page photographed with a phone, 3000 × 4000 pixels and 3.31 MB. The second is 6 pages scanned at 200 dpi, 7.33 MB in total. These are the per-page sizes in the output:
| Quality | Phone photo (1 page) | Scan (average per page) | Whole 6-page file |
|---|---|---|---|
| 90% | 435 KB | 481 KB | 2.82 MB |
| 70% | 221 KB | 242 KB | 1.42 MB |
| 60% | 125 KB | 133 KB | 798 KB |
| 50% | 111 KB | 119 KB | 712 KB |
| 40% | 99 KB | 105 KB | 628 KB |
| 30% | 54 KB | 57 KB | 344 KB |
| 20% | 43 KB | 46 KB | 274 KB |
| 10% | 29 KB | 31 KB | 185 KB |
Two things stand out. First, the two files gave very similar per-page numbers, even though one is a phone photo and the other a scan. That is because strong compression redraws every page at a fixed size, whatever the resolution of the original image. Second, the size doesn't drop evenly: it jumps at 70% and at 40%. The tool changes the rendering resolution along with the quality: about 144 pixels per inch from 70% up, about 108 from 40% to 69%, and about 86 below 40%. That is why going from 60% to 50% saves little, while going from 40% to 30% roughly halves the size.
We also tried a 6-page text PDF exported from a word processor, 5.1 KB in size. Lossless compression brought it down to 3.5 KB, and strong compression gave nothing smaller. A text file exported from Word or Google Docs doesn't need a budget at all, because it is smaller than almost any limit. If your text PDF is large, the reason is usually images inside it, or it is actually a scan.
From the limit to a quality number: practical steps
- Know your file type. If you can select text in it with the mouse, it is a text PDF: try "Lossless" first, since it changes nothing in the content. If it is a scan or phone photos, go straight to "Strong compression".
- Work out the page budget. Use the first table, or divide: limit ÷ number of pages, minus 5%.
- Pick the highest quality that fits the budget. From the measurements: a budget of 135 KB per page means 60%, 110 KB means 40%, and 60 KB means 30%.
- Compress, then read the number. The tool shows the size before and after. If it is still over the limit, go down one step and compress the original file again, not the compressed one.
- Check the hardest part of the document. Don't judge from the overall look. Zoom to 100% on the stamp, the serial number, or the smallest line on the page. If you can read it easily, so can the person reviewing it.
Why the original and not the compressed file? Because compressing a compressed file adds the second round's artifacts on top of the first, so the quality ends up worse than its number suggests. Our guide to compressing a PDF covers the tool's steps in detail; here the focus is on hitting a specific number.
What happens to legibility at low quality?
We opened the phone page after compressing it at 60%, 30% and 20%, and compared normal-size text. At 60% the letters stayed sharp and black. At 30% the text became slightly lighter with faint compression blotches around the letters, but it still read without effort. At 20% jagged edges were clearly visible; normal text was still readable, but it is not a level we trust for small numbers and stamps.
The rule we draw from our test: 30% is the lowest quality we accept for an official document. If it has a fine stamp, a signature or a small serial number, don't go below 40%. These are observations on our files; yours may tolerate more or less depending on font size and how clean the scan is, and checking at 100% is the final judge.
When quality isn't enough: five options before sacrificing legibility
1. Remove what wasn't asked for
The back of an ID card when only the front is required, a blank page from the scanner, an instructions page attached to a certificate. Every page you remove gives its budget to the remaining pages. Remove Pages does this without touching the quality of the rest.
2. Split the file if the portal takes several attachments
Many portals have one slot per document, and the limit applies per slot, not to the total. Split the file with Split PDF and upload each part to its slot, so each document keeps a higher quality.
3. Compress each document at its own quality, then merge
If one file must hold several documents, don't compress it in one go. Compress the certificate with the stamp at 50%, the ID pages or transcript at 30%, then combine them with Merge PDF. Remember that the tool applies one quality to every page of a file.
4. Retake the photo closer and cropped
In a phone photo that shows the table around the sheet, all of it gets drawn, and that space is wasted. Shoot from directly above, fill the frame with the page, and crop the photo before converting it with JPG to PDF. Our guide to turning phone photos into a PDF covers good capture technique.
5. Scan in grayscale from the start
If you have a scanner, choose "Grayscale" at 150 dpi instead of color at 300 dpi. Deciding this at the source gives a much smaller file before any compression, and it is still enough to read an administrative document. We compare this with other methods in the best PDF compression methods.
Three common cases and the fix for each
| Case | Budget | What we suggest |
|---|---|---|
| Both sides of an ID card, 2 pages, limit 200 KB | about 95 KB per page | 40% gives about 205 KB for two pages, just over the limit. Use strong compression at 30% (about 110 KB), or put both sides on one page before converting, and then 40% or even 60% fits. |
| Application file of 6 scanned pages, limit 1 MB | about 155 KB per page | Strong compression at 60%, which gave us 798 KB. No need to go lower. |
| Certificate with a fine stamp, 3 pages, limit 500 KB | about 155 KB per page | 60% fits the budget and keeps the stamp. Don't drop to 30% just because "smaller is better". |
The most common mistake in the third case is lowering quality more than needed. The portal gives you no points for being 300 KB under the limit, but a reviewer may reject a document whose stamp can't be read.
Frequently asked questions
Why does the portal reject my file when its size shows below the limit?
Usually because your computer counts a megabyte as 1,048,576 bytes while the portal counts 1,000,000. The difference is about 5%, so a file shown as "0.98 MB" may be over 1 MB for the portal. Aim at least 5% below the limit.
Should I compress the compressed file again if it is still too big?
No. Go back to the original and compress it at a lower quality. Compressing twice stacks the artifacts of both rounds, so the image ends up worse than a single pass at the lower quality.
Can I still copy and search the text after strong compression?
No. Strong compression turns each page into an image, so the text becomes part of it. That doesn't matter for a scan, which is an image already, but it does for a text PDF. So always start with lossless compression if your file is text-based.
Why did the size barely change when I went from 60% to 50%?
Because the tool renders the page at the same resolution between 40% and 69%, so only the image compression changes. The big jumps come when you go below 70% and below 40%, where the rendering resolution drops too.
Is my file uploaded to a server during compression?
No. Compression in SmokePDF runs in your browser, and the file doesn't leave your device. That matters when the documents are personal, such as an ID card or a bank statement.
The bottom line
Getting under 1 MB, 500 KB or 200 KB is arithmetic before it is compression. Divide the limit by the number of pages and keep a 5% margin, then pick the quality from the measurements: about 125 KB per page at 60%, about 100 KB at 40%, about 55 KB at 30%. Check the stamp and the small numbers at 100% before uploading. And if the limit would need less than 30% quality, remove pages or split the file, because an unreadable document is worse than a large one.